Getting started with Coconut Tickets
To get started Coconut Tickets you need to:
- Sign-up to one of the usage plans
- Login
- Enter your basic event business (or organization) profile
At this point you will reach the event dashboard which is the default "home page" for a event organizer. From this page you can reach all event organizer tools.
As an organizer, the main areas to know about are:
- Event dashboard
- Event Admin area
- Business profile area
- Event group adminevent_dashboard-1024x483.png
- Top menu
Event dashboard

The key areas to know about on the event dashboard are:
- Left hand side bar (dark grey)
- Top menu
- Subscription status
- On sale summary
- View events
- View event groups
Actions
Many of the actions that you need can be found in the left sidebar or in the top menu. These will be actions like the creation of new events, or multi-event reporting. Anything that takes action on one specific event will be found in the event admin area.
Notice that the left sidebar is initially hidden on mobile devices. It is necessary to click on the two-columns icon at the top of the page to see the sidebar.
Subscription Status
The three status circles will tell you at any time the status of your subscription. This includes how many events you have on sale and how many more you can put on sale with your current plan.
On sale summary
Below the subscription summary, when you have events on sale then you can see statistics about their sales in this area. If you don't have any events on sale then this summary will be hidden.
By default you will only see sales statistics for tickets that have had their payment settled. If you change the filter you can see all statuses.
View events
Next on the dashboard, going down the page, you will see all of your events. This list has a filter which can you change to see all your events, events on sale or only the events not on sale. To the right of the event name you will see a "view" link, if you click that then the event admin area will open up for the event that you clicked.
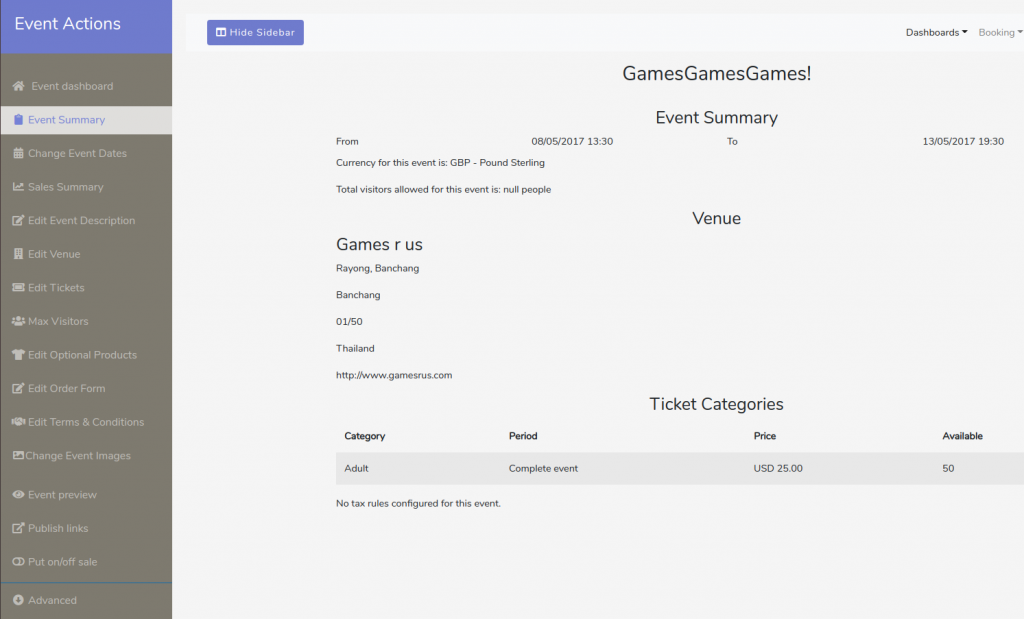
Event Admin
When the event admin area is open for one of your events you will see a different left sidebar to the event dashboard. This sidebar has all the actions that you can perform on your event; many of which allow you to make changes to the event.
See the screenshot below for an example of the event admin area.
Business Profile
Even though you will be asked some business profile questions the very first time that you login, this is not all the businss profile information.
From the event dashboard you can manage your business profile at any time by selecting the "Profile" option in the left sidebar.
When the business profile page opens it will look like the example screenshot below.

Group Admin
Underneath the event list view on the event dashboard is another list view. This list is of event groups. An event group solves the problem of having mutliple related activities taking place in the same event venue at the same time and then being able to manage them as one entity.
For example, Christmas dinner and meeting Father Christmas can be marketed as one Christmas event where the ticket customer can order tickets to either of the two events or both within the same booking (and pay once).
Any event groups you have created can be seen in this list and clicking the "view" link will open the event group admin area.
Conclusion
This article has explained the major features that you have access to after logging in. The most important being the event dashboard that you will arrive at everytime that you login.
For more information on defining event tickets please see Creating event tickets with Coconut Tickets
For more information on defining pitches please see Selling vendor pitches online with Coconut Tickets